

A roof is only as good as its weakest shingle. When those weak spots start multiplying, the clock starts ticking for a full-scale roof revival.
If you’re a contractor, here are the key aspects of roof replacement you need to know. We’ll walk you through the replacement process step by step, discuss how to spot roofs in need of replacement, and share some essential safety tips.
7 Steps for a Roof Replacement
Installing a new roof isn’t as simple as slapping on some shingles. It’s a major undertaking that requires careful planning and skilled workmanship, especially when you’re working with clients.
Let’s walk through the main steps of replacing shingled roofs:
1. Initial Inspection
Start with a thorough examination of the roof. Check for damaged shingles, sagging areas, and signs of water damage. This helps you gauge the job’s scope and spot any potential challenges early on.
2. Provide a Quote
After the inspection, sit down with the homeowner to discuss their needs and preferences. Cover material options, ventilation requirements, and any special features they want, like skylights. Once you’ve agreed on the details, put together a clear, detailed quote and get the contract drawn up and signed.
3. Prepare the Work Site
Before the job can begin, you have to take care of the prep work. This means:
- Securing any needed permits from local authorities
- Arranging for a dumpster delivery and making sure it’s placed where it won’t damage the property
- Advising the homeowner to clear the work area of vehicles, outdoor furniture, and any other obstacles that could represent a safety hazard
- Scheduling material delivery for a few days before the start date to avoid last-minute scrambling
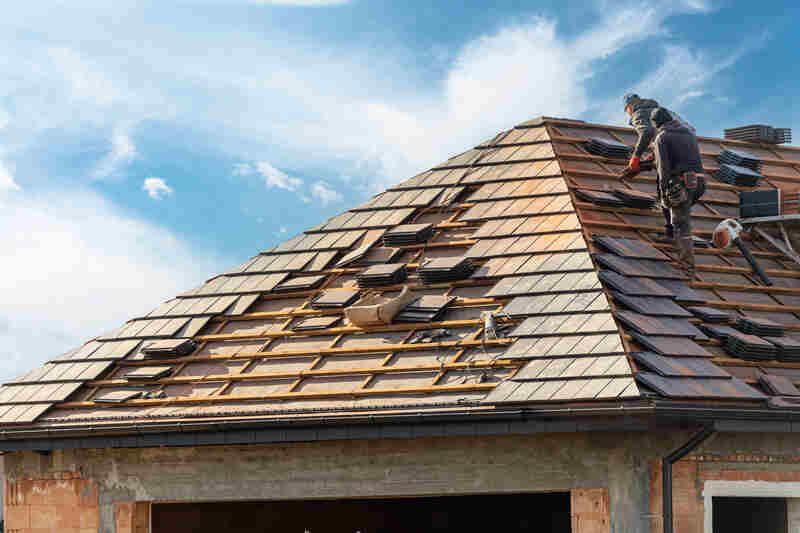
4. Remove the Old Roof
Strip the existing roofing materials down to the decking. Inspect the roof deck and flashing. Check the condition of existing flashing around chimneys, vents, and valleys. While you’re here, look for signs of rot, water damage, or structural issues in the decking and install new flashing where necessary.
A solid foundation is key to a long-lasting roof, so be sure to make any necessary roof repairs or replacements before moving forward.
FROM ONE OF OUR PARTNERS — The Parts of a Roof: A Comprehensive Guide for Roofers
5. Place the Underlayment
Once the deck is in good shape, install the underlayment. This water-resistant layer is critical for protecting the roof deck from moisture. Start at the bottom edge of the roof and work your way up, making sure each layer overlaps properly. Pay extra attention to areas prone to ice dams in colder climates.
This is also when you’ll install new flashing, such as step flashing along walls and around chimneys, that needs to be integrated with the new shingles.
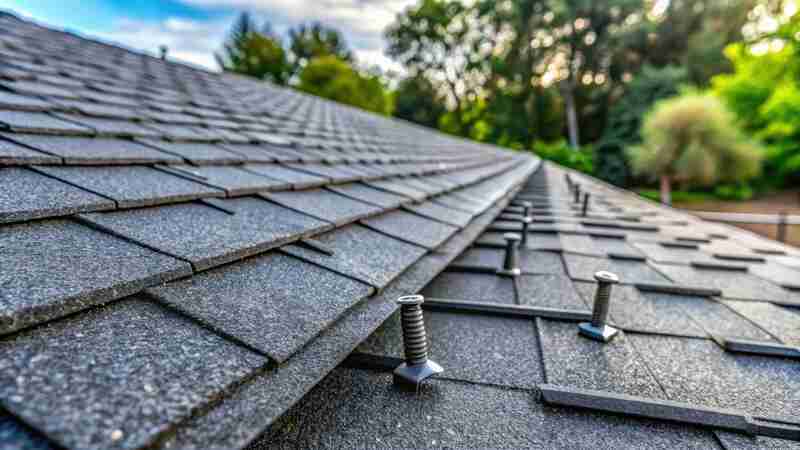
6. Install Shingles
It’s finally time to lay the shingles. Begin at the eaves and work upward, maintaining proper overlap. Use chalk lines to keep rows straight. Don’t forget to account for proper ventilation as you go. When you reach walls, chimneys, or vents, carefully cut shingles to fit and seal these areas well to prevent leaks.
7. Final Inspection and Clean-Up
Once all the components are in place, conduct a thorough final inspection. Check for proper sealing, straight lines, and secure fastening. Look for any missed nails or debris.
Finally, meticulously clean up the site. Remove all debris and leave the property in better condition than you found it.
After cleanup, walk the homeowner through the completed work. Explain what you did, point out key features, and provide instructions for proper care. This step helps you maintain your relationship with the client and set them up for success with their new roof.
RELATED ARTICLE — How To Do an Invoice for Roofing (With Free Estimate Template)
6 Signs It’s Time for a Roof Replacement
Answering this question isn’t always cut and dry, but there are some telltale signs that can help you spot a roof in need of replacement. Here’s what you and your clients should look out for:
- Age. Most asphalt shingle roofs last about 15–30 years. If the roof is pushing that age limit, it might be time for a change, even if it looks okay from the ground. The same goes for other roof types, which have varying lifespans. Slate roofs, for example, can last over a hundred years with proper maintenance.
- Damaged Materials. Keep an eye out for shingles or areas that are cracked, broken, or missing altogether. These issues can let water sneak in, causing bigger problems down the line.
- Water Damage. Water is a roof’s worst enemy. Check the attic for signs of water stains or leaks. If you see daylight coming through the roof boards, that’s a sure sign of trouble.
- Mold and Moss. A small amount of moss might look charming, but it’s bad news for the roof. Moss holds moisture against the roof surface, which can lead to damage over time. Mold is even worse because it spreads faster and poses health risks.
- Sagging. A sagging roof is a serious problem. It often means the roof deck is weakened by moisture, and it’s not something that can be ignored. If you notice any dips or waves in the roofline, it might be time for a new roof.
- Energy Efficiency Issues. A failing roof can let heat escape in winter and cool air leak out in summer, which can cause a spike in energy bills. Replacing an old roof with a new, energy-efficient one can help cut down on those costs.
How Much Is a Roof Replacement?
Giving an accurate roofing cost estimate is critical for winning bids and maintaining client trust. There are a few main factors that affect roof installation costs:
- Size. The total square footage of the roof is the starting point for any estimate. Larger roofs naturally require more materials and labor costs.
- Materials. The type of roofing material heavily impacts the overall cost. From basic asphalt shingles to metal roofs, each material comes with its own price point.
- Repairs Required. Damaged decking or the need for structural repairs can quickly drive up the cost of a replacement.
While roofing contractors typically charge between $3 and $15 per square foot for common materials, it’s important to remember that this range can vary widely. Complex roof designs or premium materials often justify higher rates.
Your final estimate may not land close to the average cost of replacing a roof. But don’t undervalue your expertise and time when dealing with these more challenging projects.
Here’s a look at some ranges for the average roof replacement cost based on square footage and materials so you know what to estimate. Note that it’s also common to measure the size of a roof based on roofing squares, which are equal to 100 square feet of roof area.
| Square Feet | Cost (in USD) |
| 1,000 | 3,000–15,000 |
| 1,100 | 3,300–16,500 |
| 1,200 | 3,600–18,000 |
| 1,300 | 3,900–19,500 |
| 1,400 | 4,200–21,000 |
| 1,500 | 4,500–22,500 |
| 1,600 | 4,800–24,000 |
| 1,700 | 5,100–25,500 |
| 1,800 | 5,400–27,000 |
| 1,900 | 5,700–28,500 |
| 2,000 | 6,000–30,000 |
| 2,100 | 6,300–31,500 |
| 2,200 | 6,600–33,000 |
| 2,300 | 6,900–34,500 |
| 2,400 | 7,200–36,000 |
| 2,500 | 7,500–37,500 |
| 2,600 | 7,800–39,000 |
| 2,700 | 8,100–40,500 |
| 2,800 | 8,400–42,000 |
| 2,900 | 8,700–43,500 |
| 3,000 | 9,000–45,000 |
When presenting this pricing information to clients, it’s crucial to explain the value they’ll be getting for their investment. Highlight the quality of materials, your team’s expertise, and the long-term benefits of a properly installed roof. This approach justifies your pricing and sets you apart from competitors who may be undercutting the market.
Just keep in mind that ongoing costs will also affect your expenses. As a roofer, you’ll need general liability insurance and commercial auto insurance at a minimum. If you have employees, you’ll also need workers’ compensation insurance.
RELATED ARTICLE — How To Price a Roofing Job (for Contractors)
5 Tips for Staying Safe During a Roof Replacement
Safety should be the top priority on any job site. A moment of carelessness can lead to serious injuries. Here are some tips to keep you and your team safe while working on a client’s new roof:
- Use the Right Gear. Proper equipment is your first line of defense against accidents. Always wear a fall protection kit, including a harness and lanyard. Don’t forget about sturdy, non-slip footwear to keep your grip on the roof surface.
- Keep the Roof Surface Clean. A cluttered workspace is an accident waiting to happen. Regularly clear away debris, tools, and materials you’re not currently using. This reduces the risk of trips and falls.
- Watch the Weather. Roofing and bad weather don’t mix. Keep an eye on the forecast and avoid working in rain, high winds, or extreme temperatures. Even morning dew can make a roof dangerously slippery, so choose when you work wisely.
- Have a Partner. Two sets of eyes are better than one. Working with a partner means someone’s always watching your back. They can spot potential hazards you might miss and provide immediate help if something goes wrong.
- Stay Hydrated and Take Breaks. Roofing is physically demanding work, especially in hot weather. Drink plenty of water and take regular breaks to prevent heat exhaustion and stay focused.
RELATED ARTICLE — Roofing Estimates: How Much Does a Roof Replacement Cost?
Win More Clients With Joist
Your clients don’t want to wait days for a roofing estimate. Taking too long can make the difference between landing the job and letting it slip through your fingers to another company.
With Joist, you can create and share estimates in just minutes. This easy-to-use mobile estimating tool is packed with powerful features built for contractors, including Deposits, Markups, Contracts, and Photos.