As a roofing contractor, you know how much precision matters. But are you as meticulous when it comes to your roofing bids? Miss a measurement by an inch, and you could lose by a mile—or a paycheck.
The key is to split up the bidding process into simple steps. That way, you’ll win jobs with prices that work. They won’t be too high to scare away clients or too low to hurt your business.
Whether you’re a hungry rookie or a seasoned pro, this guide breaks down how to bid a roofing job and win more clients.
RELATED ARTICLE — Roof Replacement Guide for Contractors: Steps and Costs
What Is a Roofing Bid?
A roofing bid is a professional document that outlines what you’ll do for a client and what it’ll cost. Typically, potential clients consider several bids before choosing a roofing contractor. That’s why it’s critical to make sure yours stands out from the competition.
A good bid needs to walk a fine line. It should be simple enough that homeowners can understand your roofing estimate without getting lost in contractor talk, but detailed enough to show the real value of your work.
The best bids avoid underbidding while winning jobs that make good money. Plus, when clients see everything laid out clearly, they’re more likely to trust you with their roofing project.
Every strong bid includes at least these core pieces:
- A detailed cost breakdown
- A list of services you and your team will provide
- The client’s information
- Any special notes about the job
- Clear terms about the work
Once the client signs off, these details are set in stone. You can only change them if both sides agree.
RELATED ARTICLE — Roofing Estimates: How Much Does a Roof Replacement Cost?
How To Bid a Roofing Job: 6 Simple Steps

Successfully bidding a roofing job takes time and care, but it’s a lot more manageable when you take it step-by-step. Here’s how to do it:
1. Understanding the Job
Asking the right questions starts you out on the right foot. Before you grab your tape measure, sit down with the homeowner. Ask about their budget, what type of roof they need, and if they want special features like solar panels that might affect costs.
The inspection needs to cover everything that could impact the roofing job. Check the condition of existing shingles, look for damaged underlayment, and note any problem areas.
Pay special attention to building codes. They’ll tell you what types of roofing materials you need and how to install them. This includes requirements for shingles, ventilation, and proper underlayment.
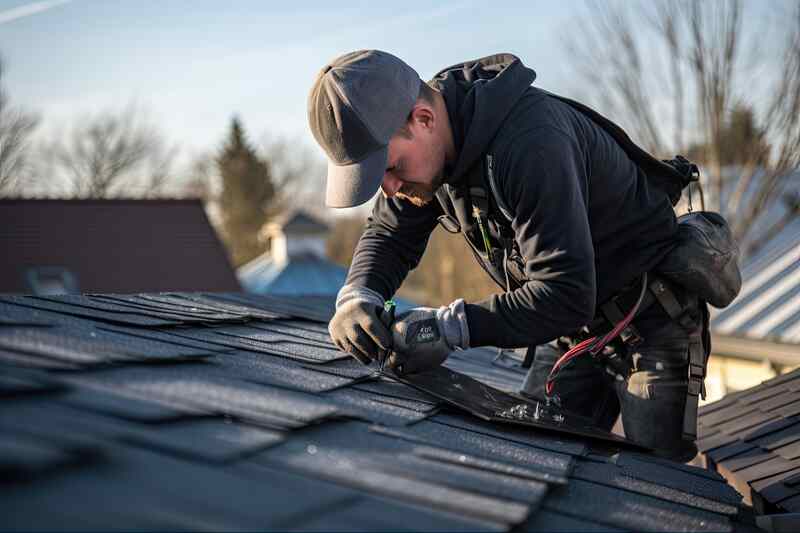
Take plenty of photos during your inspection. Document anything that might increase labor costs, like multiple layers of old roofing that need removing or tricky spots around chimneys. Look for obstacles that could slow down your crew, like overhanging trees or difficult access points.
Photos help explain your bid to clients and protect you as a roofing contractor if questions or disputes come up later.
FROM ONE OF OUR PARTNERS — The Parts of a Roof: A Comprehensive Guide for Roofers
2. Measure the Roof
Every roofing job starts with accurate measurements. Roofers use a unit called a “square.” One roofing square equals 100 square feet. Understanding squares helps you calculate materials and labor costs correctly.
Start by finding the total square footage by multiplying the length of the roof by its width. For example, a roof that’s 50 feet long and 20 feet wide is 1,000 square feet. Divide this number by 100 to get your ground-level squares. This example roof would be 10 squares at ground level.
But ground-level squares don’t tell the whole story. You also have to consider the roof pitch, which you can calculate with the table below. In general, a steeper-pitched roof needs more shingles than a flat one.
For a 6:12 pitch, the roof rises 6 feet up for every 12 feet. Instead of calculating how much to add to account for roof pitch on every job, it’s easier to consult a chart of common figures:
| Roof Pitch | Multiplier |
| 3:12 | 1.031 |
| 4:12 | 1.054 |
| 5:12 | 1.083 |
| 6:12 | 1.118 |
| 7:12 | 1.158 |
| 8:12 | 1.202 |
| 9:12 | 1.250 |
| 10:12 | 1.302 |
| 11:12 | 1.357 |
| 12:12 | 1.414 |
Looking at the chart, you can see that a 6:12 pitch needs a multiplier of 1.118. So, with our 10 ground squares example, you would multiply 10 by 1.118 for a total of 11.18 squares of material.
Many roofing contractors take advantage of modern tools to measure roofs. Digital apps can calculate squares automatically. These tools help prevent underbidding by giving exact numbers for labor and materials.
3. Estimate Roofing Material Costs
Fully understanding your material costs makes sure your clients know exactly what they’re getting into and that you don’t leave money on the table.
For a shingle roof, you’ll need to calculate the cost of shingles, which is usually calculated per square foot. Pricing depends on the type of shingles. Asphalt shingles are some of the cheapest, and premium options can cost a lot more. To calculate your shingles cost, multiply your total squares by the cost per square. This calculation applies to most shingle materials that you can purchase by square foot, like metal or tile.
But shingles are far from your only cost. You’ll also need to factor in materials like nails per square, underlayment and flashing, and ridge caps. It’s easy to lose money by forgetting to calculate these extra materials.
Finally, if you have a team, carefully plan out how much you’ll need to pay them and how that affects your bottom line. You can do this by multiplying the number of workers you need by the hours you expect the job to take. Then add on a number like 20% to cover your labor rate for taxes and insurance.
Tough jobs with added complexity like steep pitches or multiple layers of old shingles need extra labor time, so don’t forget to include them in your calculations.
Using a roofing estimate tool can make this whole process easier.
FROM ONE OF OUR PARTNERS — The Roofer’s Quick Guide to Types of Metal Roofing
4. Calculate Overhead Costs
On top of the costs of materials and other expenses specific to each roofing job, overhead costs follow you from job to job. They include all your regular business costs—think rent, insurance, truck payments, and office supplies. Even your estimating software might have a monthly subscription cost.
Breaking down overhead is simple. Start by adding up all your monthly costs. Then, calculate your hourly overhead depending on how many hours you expect to put in each week.
5. Factor in Your Markup
Knowing how to price a roofing job makes all the difference in getting new clients. This means dialing in your markup to maximize your chances of hitting your target profit margin every time.
Many roofing contractors aim for a 10–20% profit margin, but it depends on your business goals. To hit these numbers, you’ll need the right markup on labor costs and materials. For example, if a job costs you $1,000 and you want 10% profit, you’ll divide $1,000 by 1.1 to find the price that will cover your 10% profit margin: $1,100.
RELATED ARTICLE — How To Price a Roofing Job (for Contractors)
6. Make the Finishing Touches
Having all your ducks in a row demonstrates professionalism to help seal the deal. This means you should:
- Include your license and insurance details
- Use a clear payment schedule and project timeline
- List exactly which materials you’ll use, from shingles to underlayment
You also want your bid to look polished. Use your company logo, keep the layout clean and simple, and use templates from professional estimate software to streamline the process.
Send your bid quickly after meeting the client. Walk them through the major points and show them photos of problem areas you discovered during inspection. Explaining how your work will fix these issues and answering questions promptly helps clients feel that their roof will be in the right hands. Don’t hesitate to follow up in a few days if you haven’t heard back.
3 Tips for Winning a Roofing Bid
Getting your bid noticed means going beyond prices and promises. Here are some ways to stand out:
- Stand Out Online. Set up a clean website that’s easy to use and clearly displays your contact information and service area. Show off your best before-and-after photos and add real customer reviews to give a tangible sense of your skills.
- Match the Market. If you can, check out what other roofers are charging in your area by looking at similar roofing jobs nearby. You should also know your local material costs. This makes it easier to strike the right balance between affordability for your clients and profitability for you.
- Offer Package Options. Giving clients more control over what they’re paying for helps them feel more involved. Start with a basic package using standard shingles, create a mid-level choice with better materials, and add a premium option that offers top-grade materials and extra services. You can also develop a list of materials and special add-ons for clients to choose from to create their own package.
RELATED ARTICLE — How To Ask for Deposits as a Residential Contractor (+ Samples)
Stay Organized and Manage Customers With Joist
Spend less time on paperwork and more time fixing roofs with Joist.
This contractor software lets you store, access, and export customer information from anywhere, at any time. Keeping track of customers and jobs just got that much easier.